DIY Acoustic Treatment: How I Transformed My Home Studio
In the world of music production, it’s easy to get caught up in acquiring the latest gear—whether it’s high-end microphones, expensive monitors, or cutting-edge software. However, I realized that no matter how advanced your equipment is, it can’t compensate for poor room acoustics. That’s why I decided to invest my time and resources into building effective acoustic treatment for my home studio, rather than splurging on gear. The result? Remarkably clear sound and impressive reverb reduction, all achieved with a DIY approach.
Why Prioritize Acoustic Treatment Over Gear?
Many musicians and producers focus heavily on the gear they use, believing that better equipment will lead to better sound. However, even the most expensive monitors won’t perform at their best in a room with poor acoustics. Here’s why I chose to prioritize acoustic treatment:
1. Improved Sound Accuracy: Without proper treatment, you can’t truly hear what your monitors are outputting. Reflections and reverb distort the sound, making it hard to make precise mixing decisions.
2. Long-Term Investment: Acoustic treatment benefits every piece of gear you own, enhancing your overall production quality. Good room acoustics make every mix clearer and more balanced.
3. Cost Efficiency: Instead of spending thousands on new gear, I opted to improve the foundation—my studio space. This not only saved money but also maximized the potential of the gear I already had.
DIY Acoustic Treatment: My Journey
Materials and Costs
For my DIY acoustic treatment project, I built 9 large absorbers (200cm x 65cm x 14cm) and 4 smaller ceiling absorbers. Here’s a detailed cost breakdown:
• Rockwool Stone Wool: €126
• OSB Boards: €217.20
• Fabric for Covering: €195
• Miscellaneous (screws, glue, small feet for panels): Minimal additional cost
Total Cost: €538.20
This investment was far more affordable than professional acoustic solutions, and it provided excellent results.
Step-by-Step Construction Process
1. Material Sourcing
I began by sourcing the materials from a local hardware store and fabric retailer. I chose Rockwool for its outstanding acoustic absorption properties, particularly in reducing mid and high frequencies.
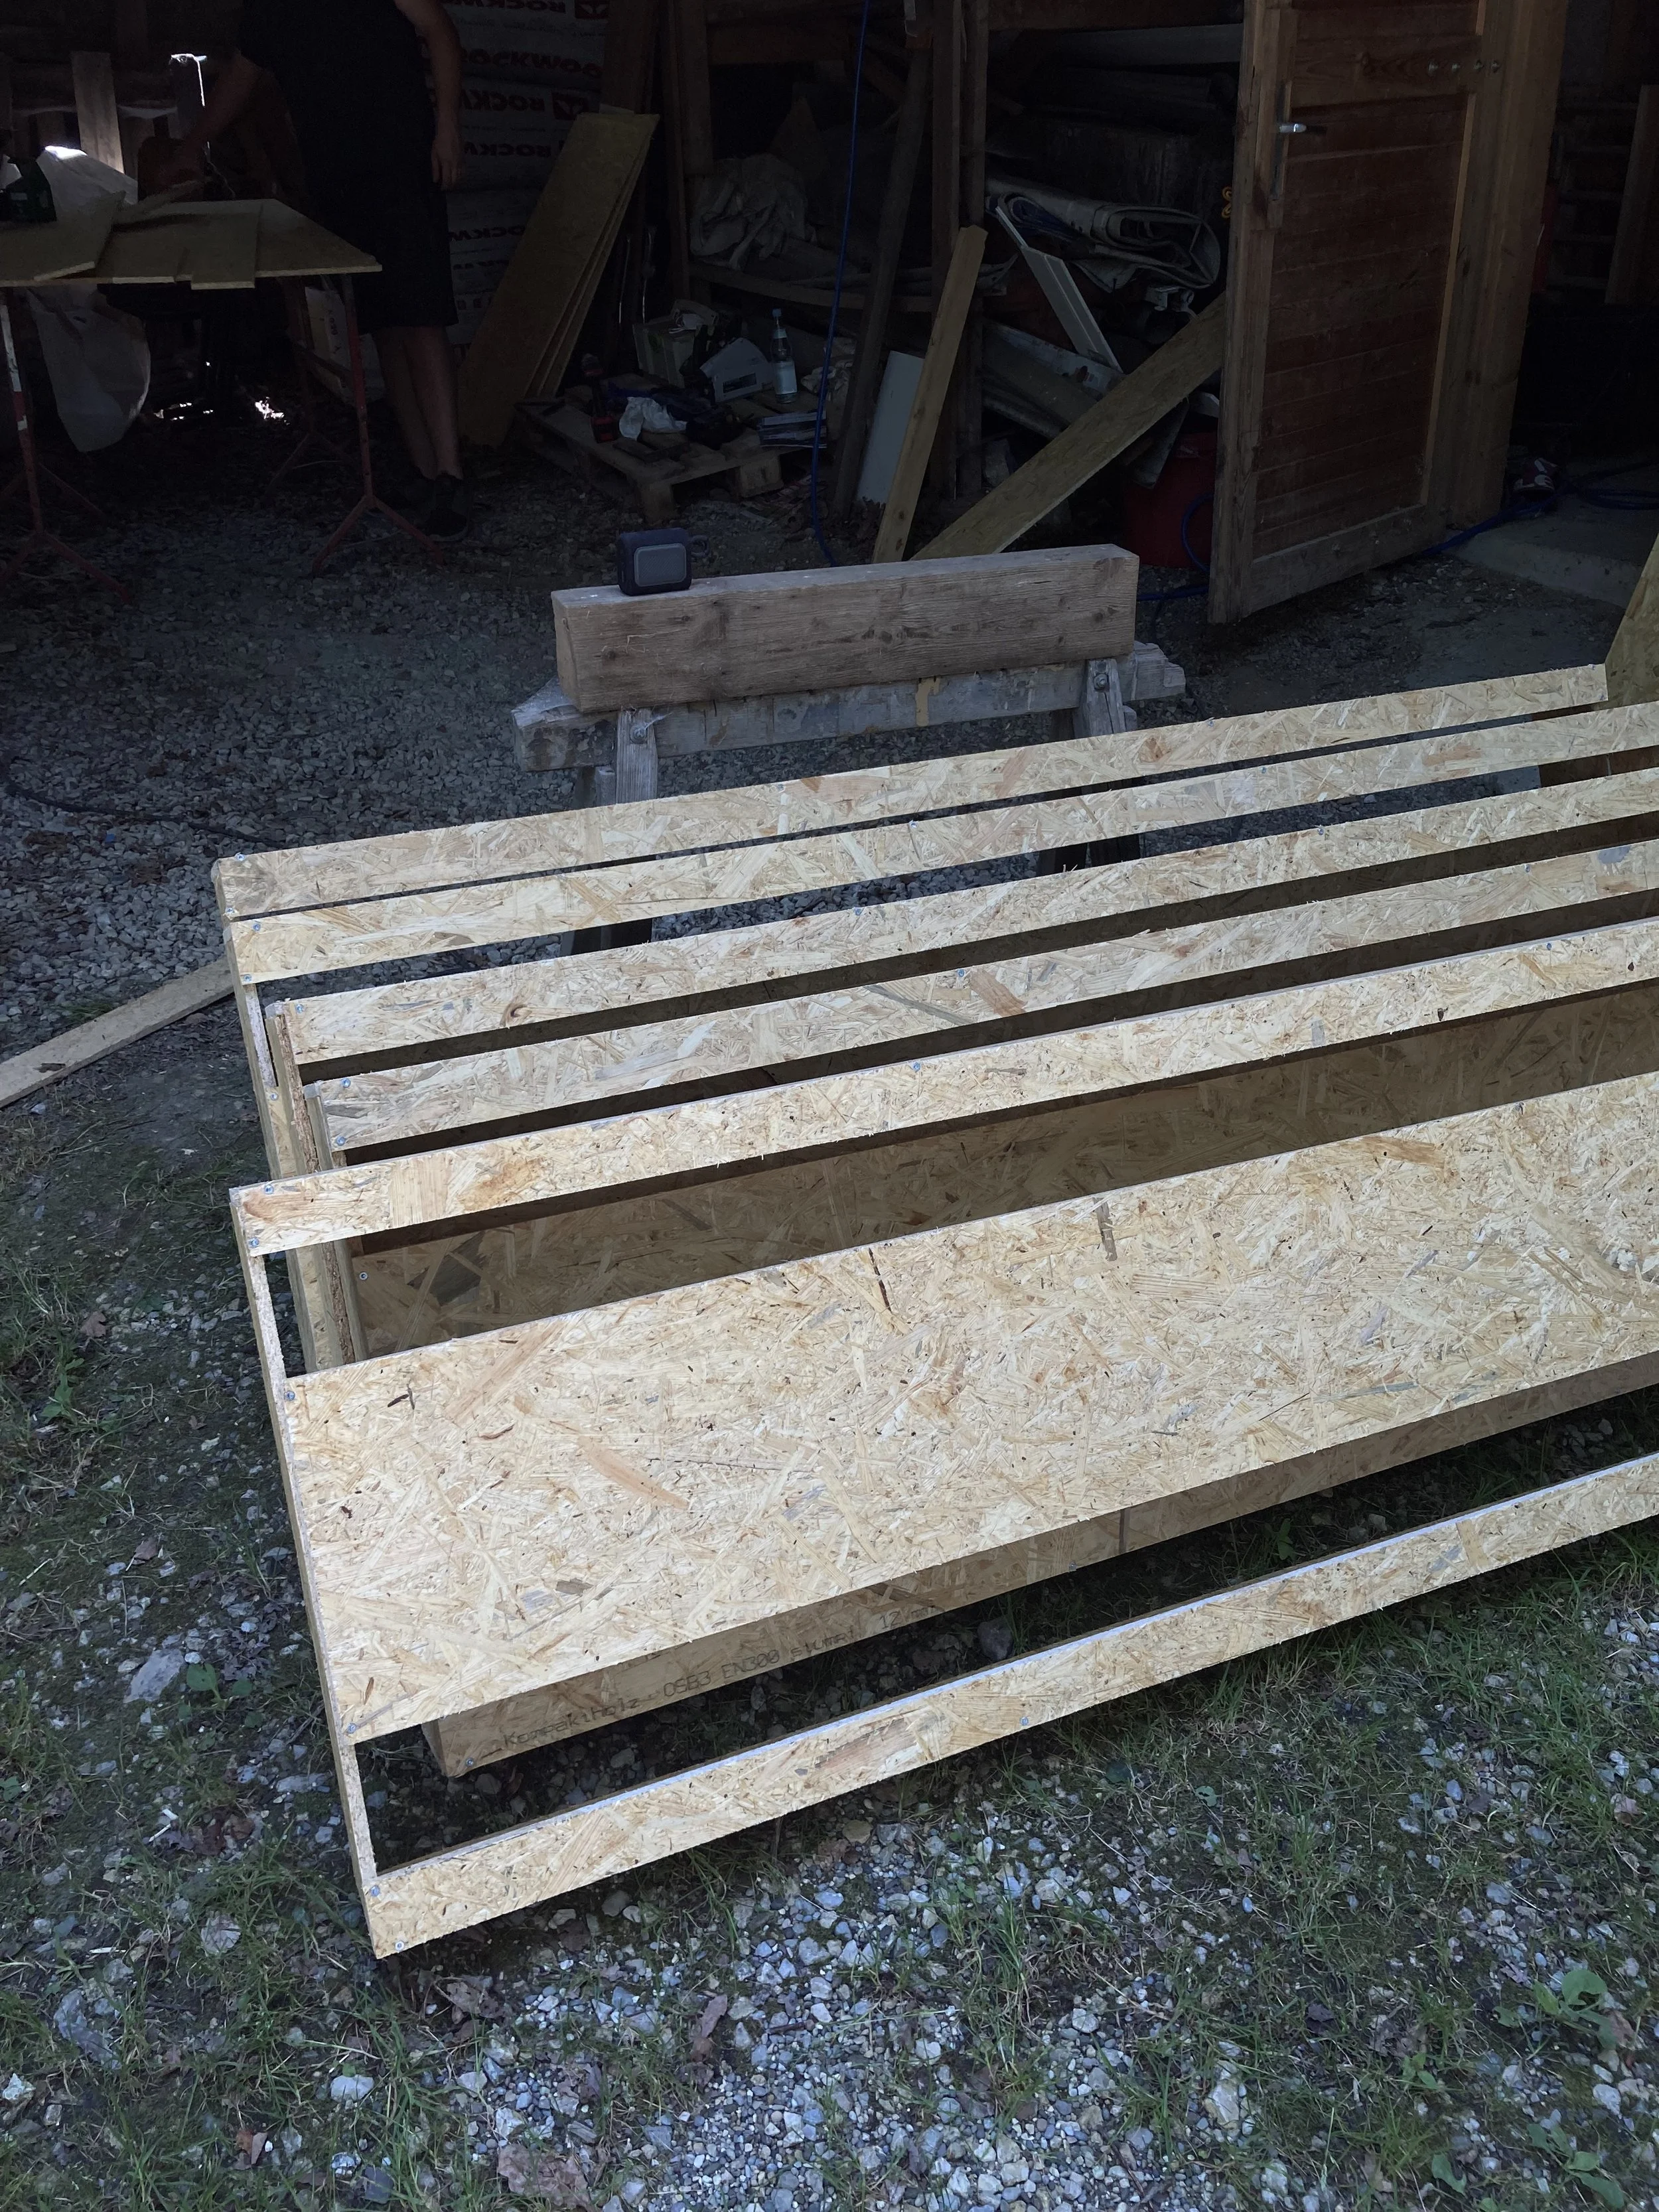
2. Cutting and Assembling the Frames
Using a circular saw, I cut OSB boards to create the frames.
These frames were designed to hold the Rockwool securely while maintaining a slim profile. I ensured all cuts were precise to avoid gaps that could compromise the panel’s effectiveness.
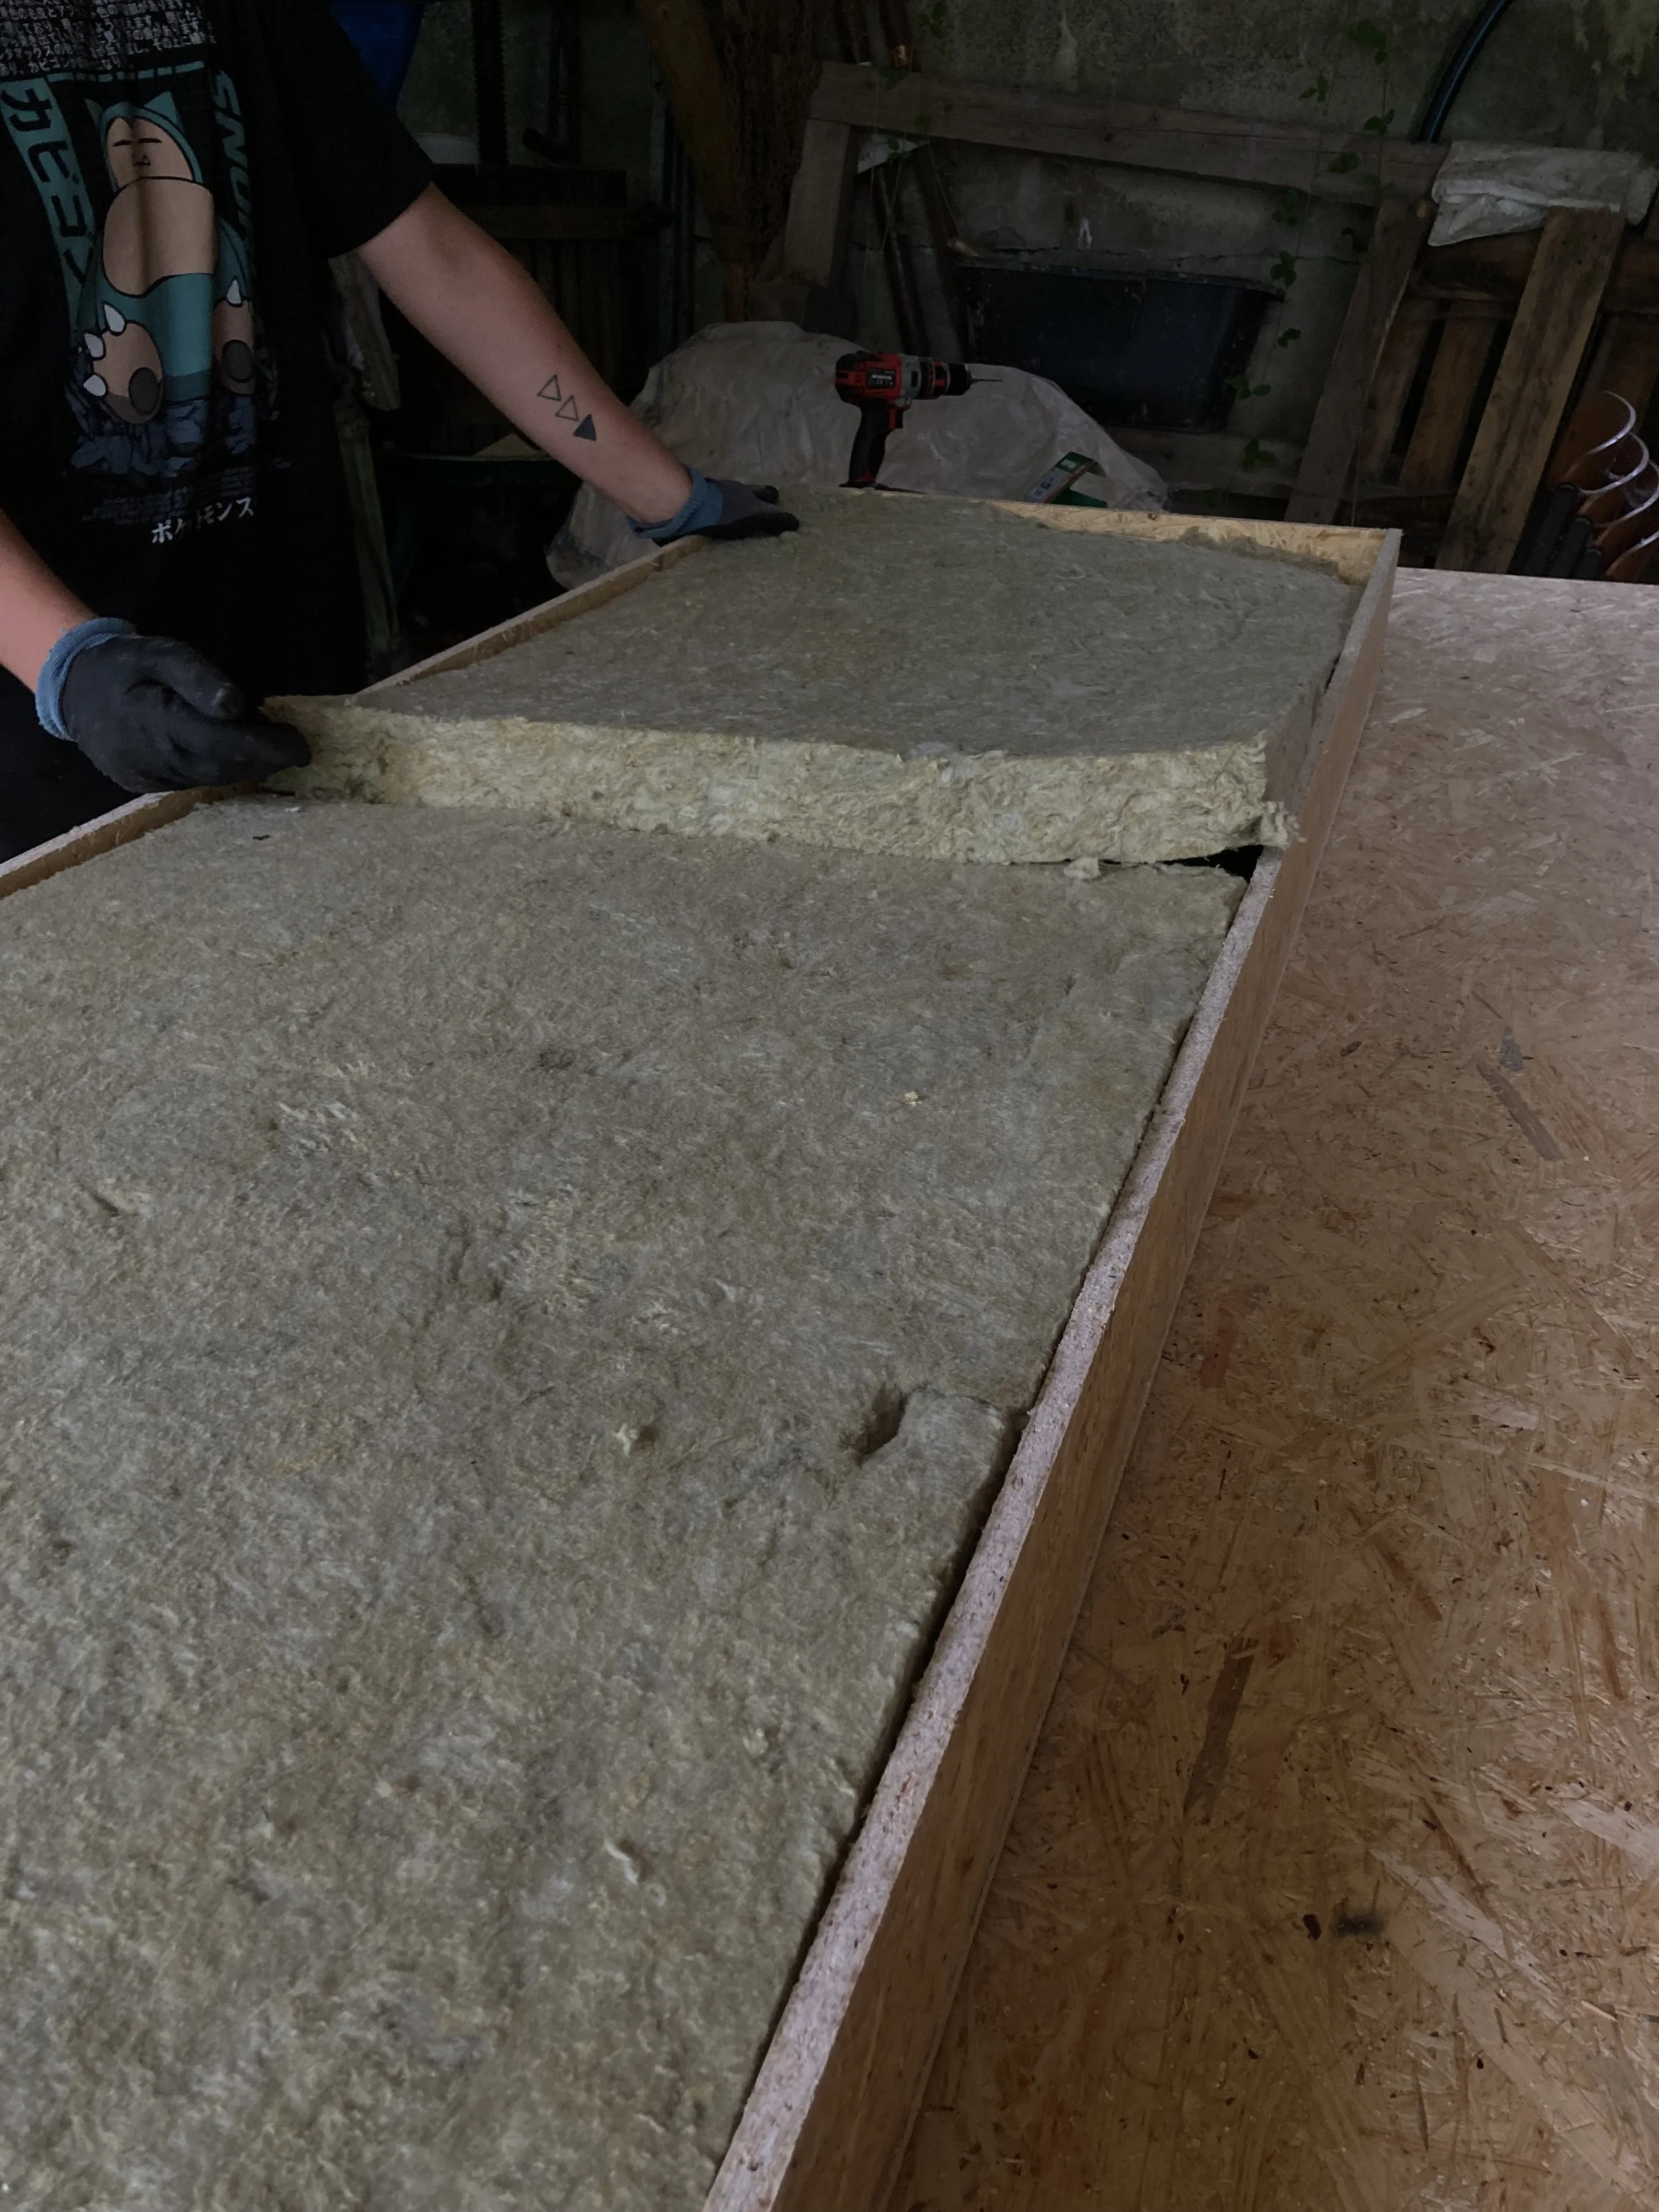
3. Filling with Rockwool
Once the frames were assembled, I inserted the Rockwool slabs. This step was crucial, as the density and placement of the material directly impact its ability to absorb sound. Each slab of Rockwool was 6 cm thick, but instead of using a single layer, I stacked two layers to achieve a total thickness of 12 cm per panel.
This decision was based on the understanding that thicker absorbers are better at handling lower frequencies, which are typically harder to manage in small rooms. By doubling the thickness, the panels not only excelled at absorbing mid and high frequencies but also provided improved bass trapping capabilities.
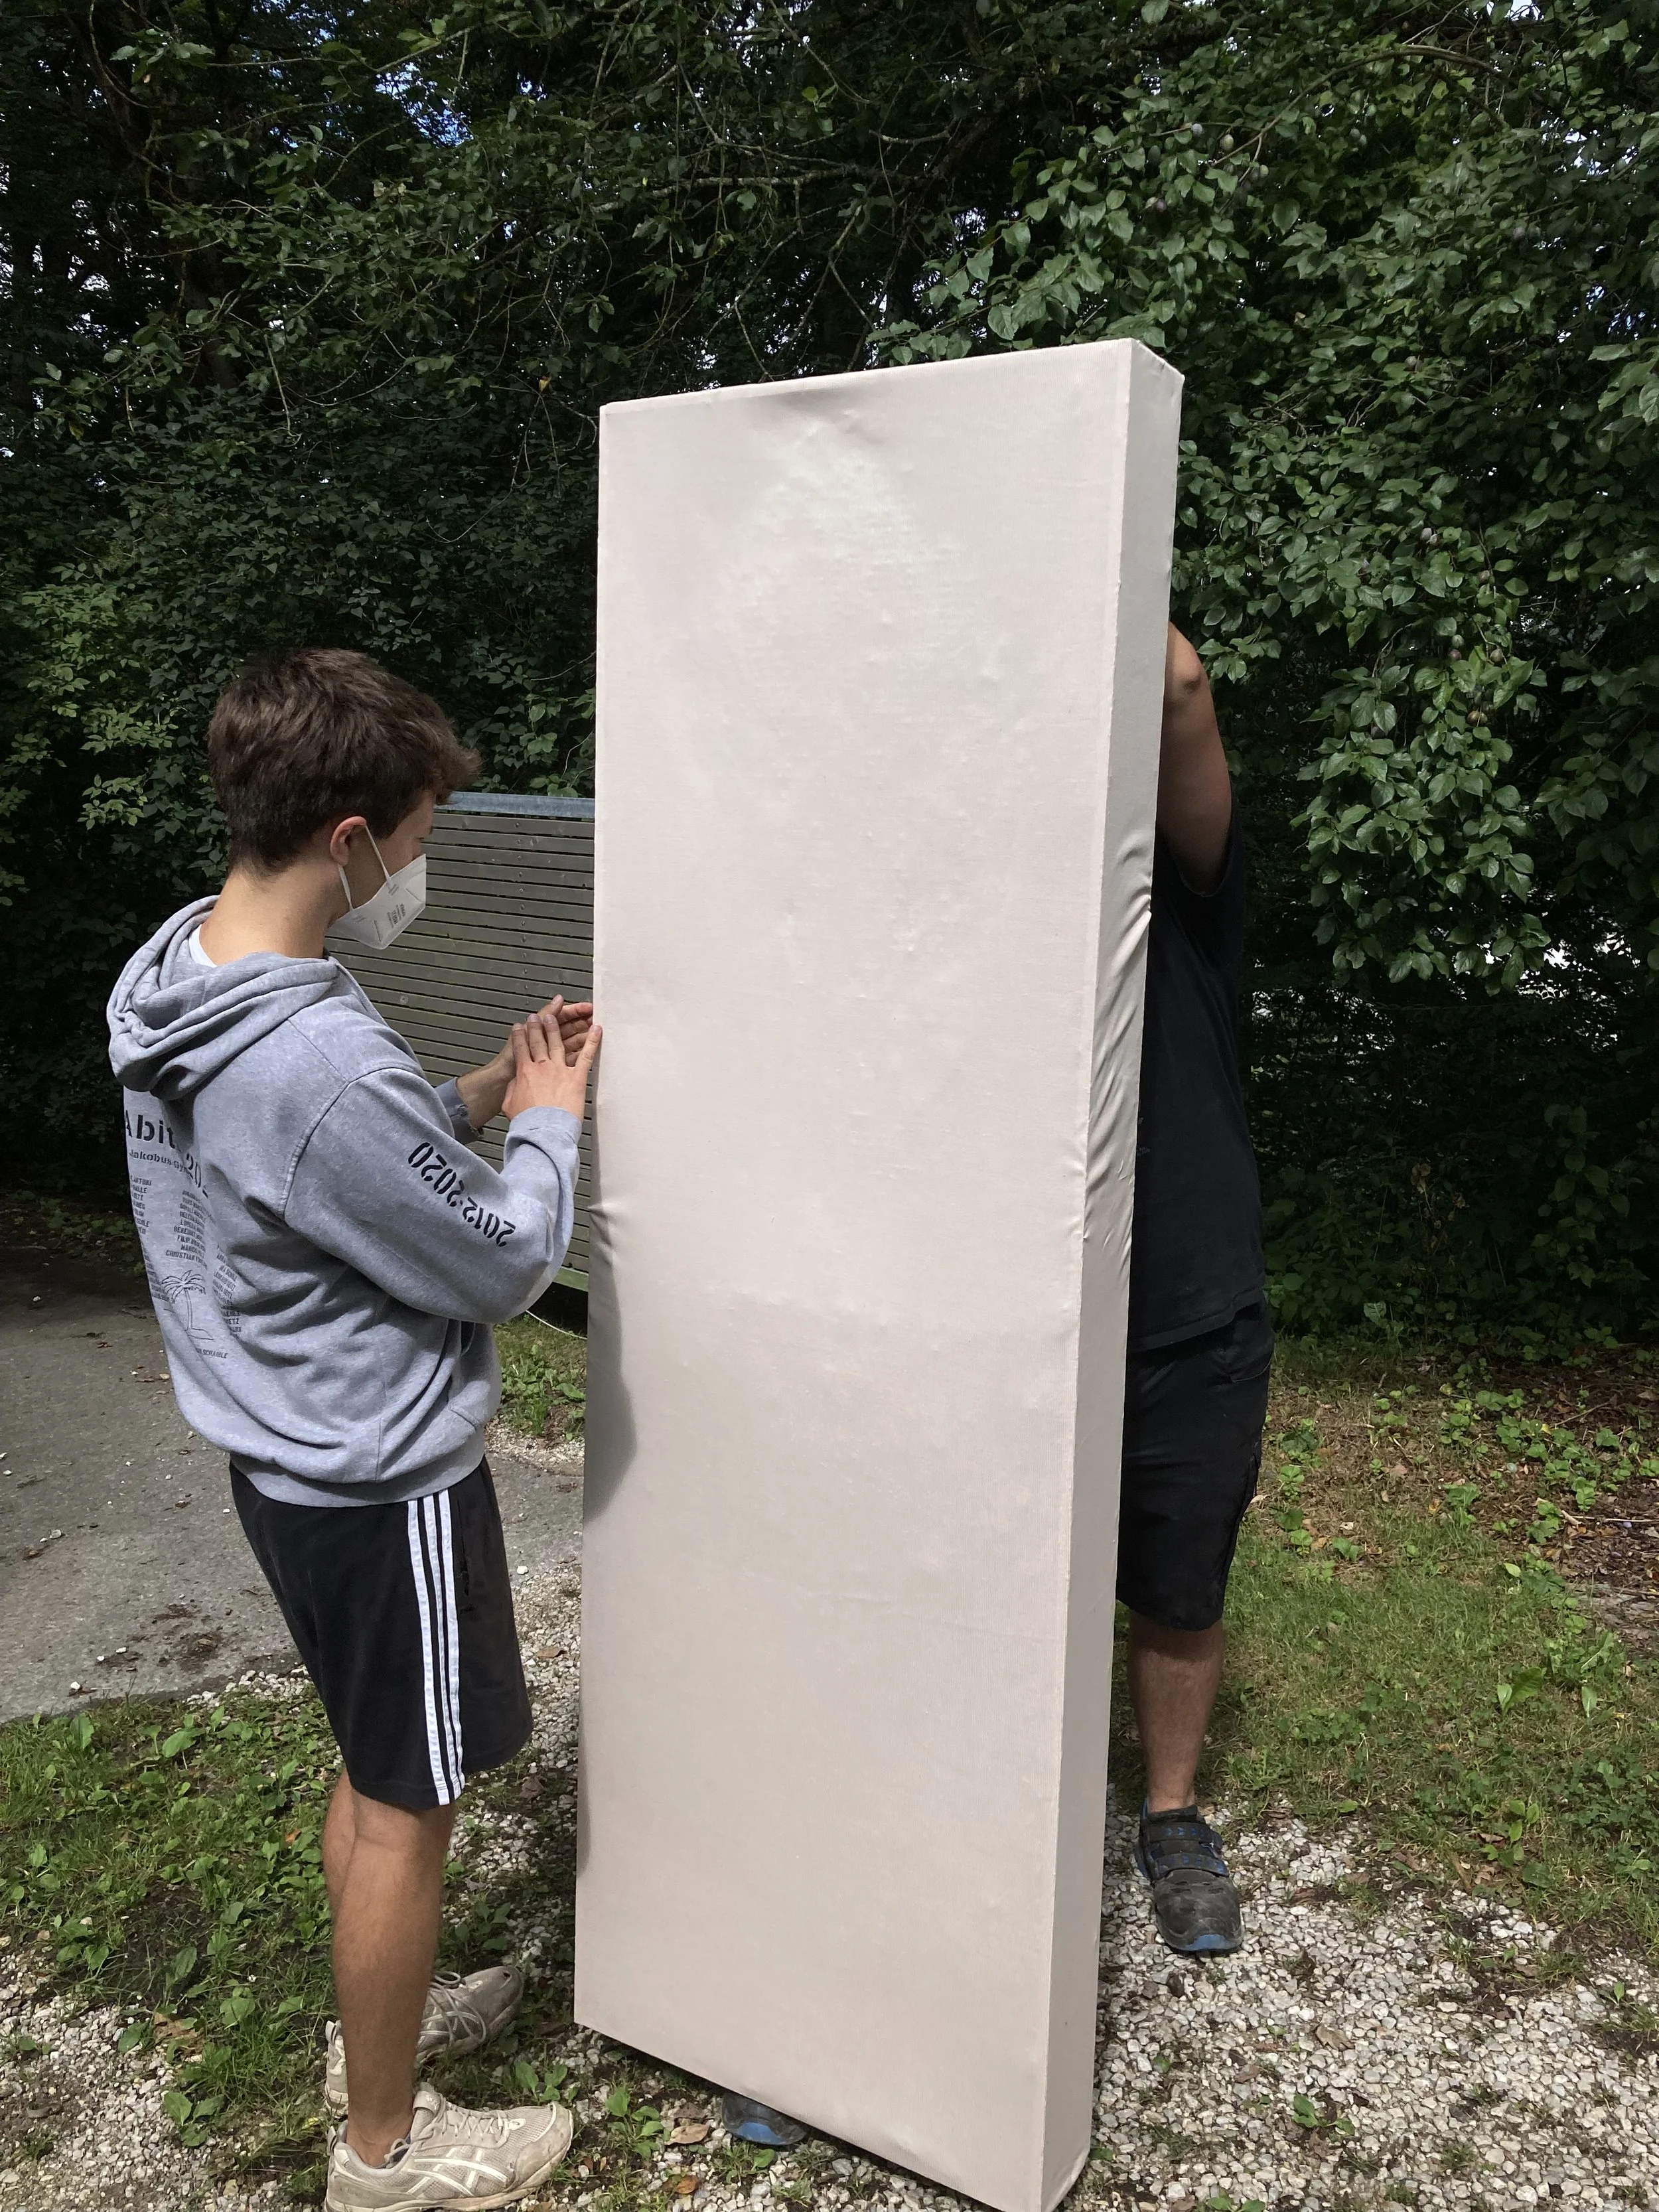
4. Covering with Fabric
To secure the Rockwool and add a professional touch, I stretched fabric tightly across the front of each panel. This not only kept the Material in place but also enhanced the studio’s aesthetics.
The combination of function and form resulted in a studio space that feels both professional and inspiring. The absorbers are not just utilitarian; they contribute to the room’s character, making it a place where I enjoy spending time and feel creatively energized. The harmonious integration of the absorbers with the green walls underscores how thoughtful design can elevate both the aesthetic and functional aspects of a space.
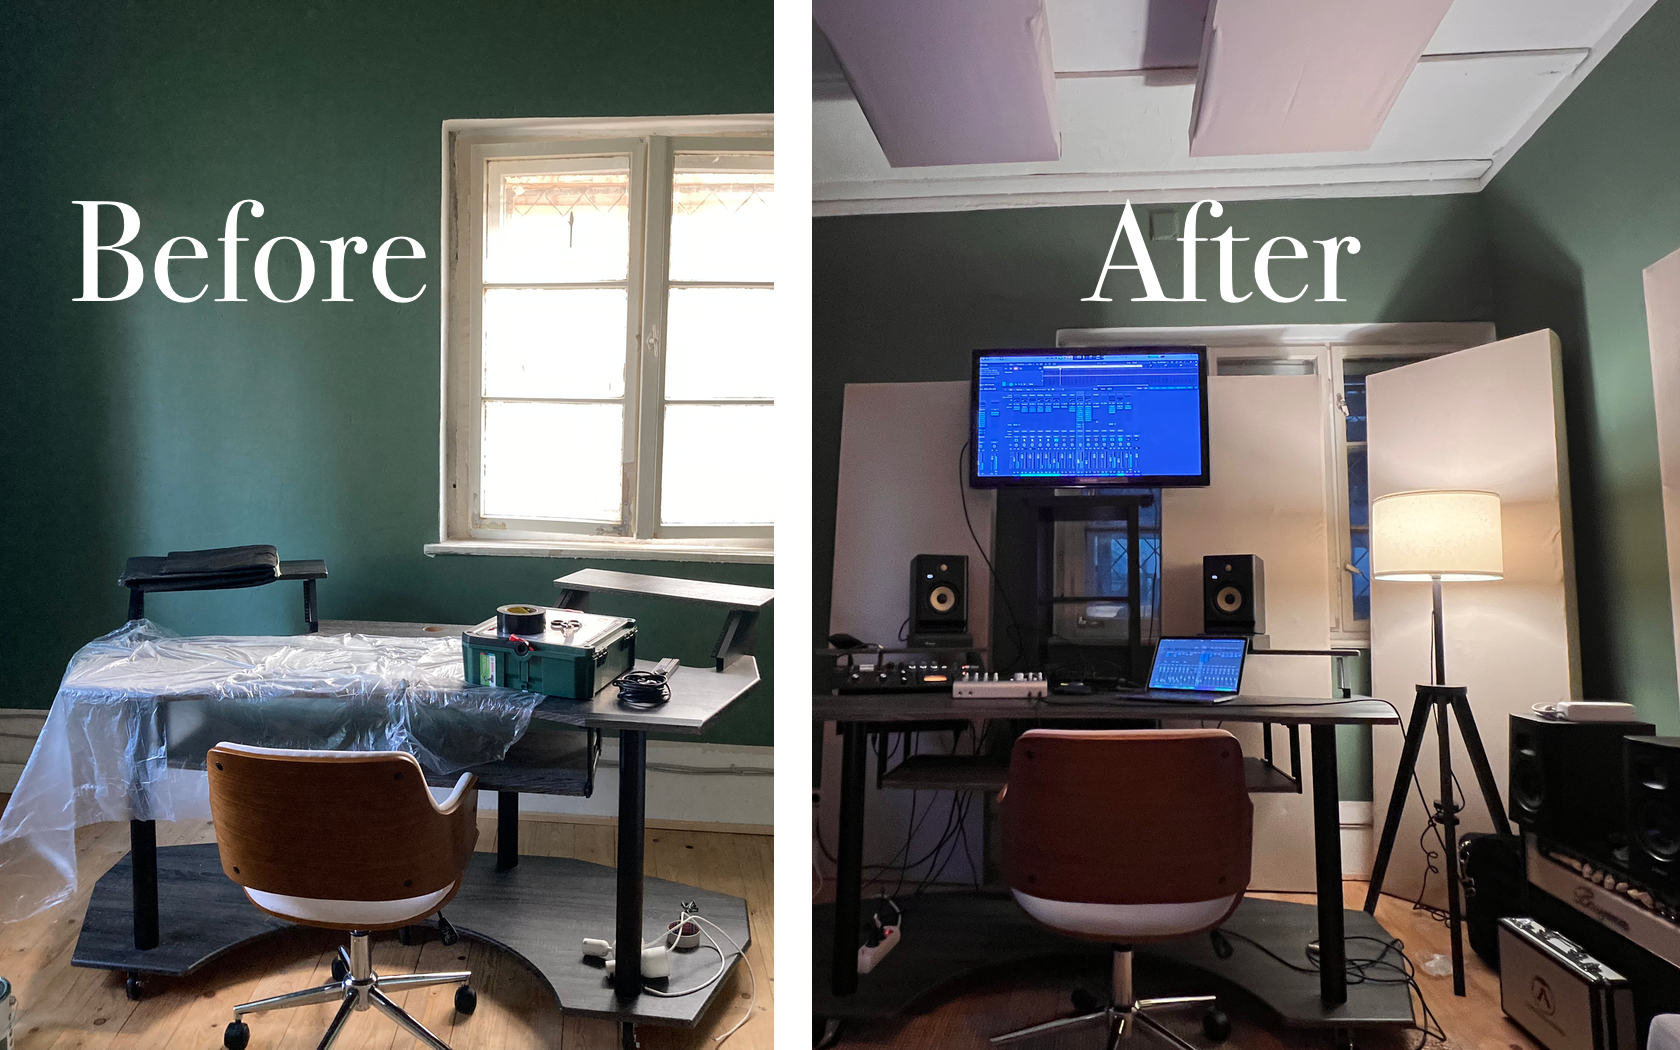
5. Installing the Panels
Finally, I installed the panels strategically around the room, focusing on reflection points and corners. I added small feet to the bottom of the larger panels to help them press firmly against the walls.
Acoustic Results
After completing the installation, the difference was immediately noticeable. The reverb in the room was significantly reduced, and the clarity of the sound improved drastically. While I plan to conduct precise acoustic measurements soon, I can confidently say that
I’ve achieved excellent reverb time values, bringing my room closer to a professional studio environment.
The Importance of Reverb Time (RT60)
Reverb time, often measured as RT60 (the time it takes for sound to decay by 60 dB), is a critical factor in studio acoustics. In an untreated room, excessive reverb can mask important details in the sound, making it hard to distinguish between different frequencies.
In my studio, the DIY panels brought down the reverb time to much more manageable levels. This not only made mixing easier but also improved the overall listening experience, allowing me to hear more detail in my recordings.
Why DIY Acoustic Treatment is Worth It
1. Cost-Effective: My project cost just over €500, a fraction of what professional acoustic treatment would have required.
2. Customizable: I tailored the design and size of the panels to fit my specific studio layout, ensuring optimal performance.
3. Satisfaction and Learning: Building the panels myself gave me a deeper understanding of acoustics and a sense of accomplishment that you can’t get from simply buying pre-made solutions.
Conclusion
By investing time and effort into DIY acoustic treatment, I’ve transformed my home studio into a space that allows me to make better music. The clarity and accuracy of the sound in my studio have improved significantly, proving that good acoustics are a foundational element of any production environment.
If you’re looking to enhance your studio’s sound, I highly recommend focusing on acoustic treatment before upgrading your gear. With a few days of work and a modest budget, you can achieve professional-level results that will elevate every aspect of your music production.